🔒 Setup Bitwarden Account
Last updated on : 2021-06-11
Instructions
What you should know
- The Free Basic Plan is already very complete, the most important thing that your organisation is missing out on is the ability to easily share passwords, and assign an emergency contact. The most important thing for you is that you will need a separate app to manage your 🔒 Use Multi-Factor Authentication.
- This guide is to setup BitWarden for your work purposes. If you are using the Free Basic Plan, you can also add your own private passwords, but if your organisation is using a Business Plan, we recommend that you create a separate BitWarden account (on the free plan) for your personal passwords to that the two don't mix.
- Once you have finished the basic setup you may also want to 🔒 Setup Bitwarden on Desktop or 🔒 Setup Bitwarden on Mobile on your smartphone.
What you should prepare
Have your Passphrase Ready
Remember the passphrase you wrote down using Diceware? We'll use it for BitWarden.
If you haven't generated a strong passphrase yet, or can't remember, follow the instructions to 🔒 Generate Strong Passphrases.
What you should do
1. Create an Account
- Is your Organisation is on a Business Plan, or will you use the Basic Free Accounts?
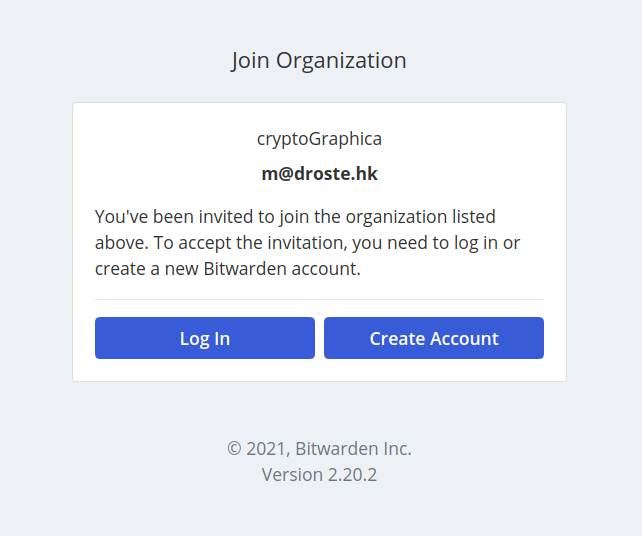
- If your organisation has 🔒 Setup BitWarden for the Organisation, you will have received an invitation to join the organisation via your work email. Click on the link to start your account setup.
The email looks like
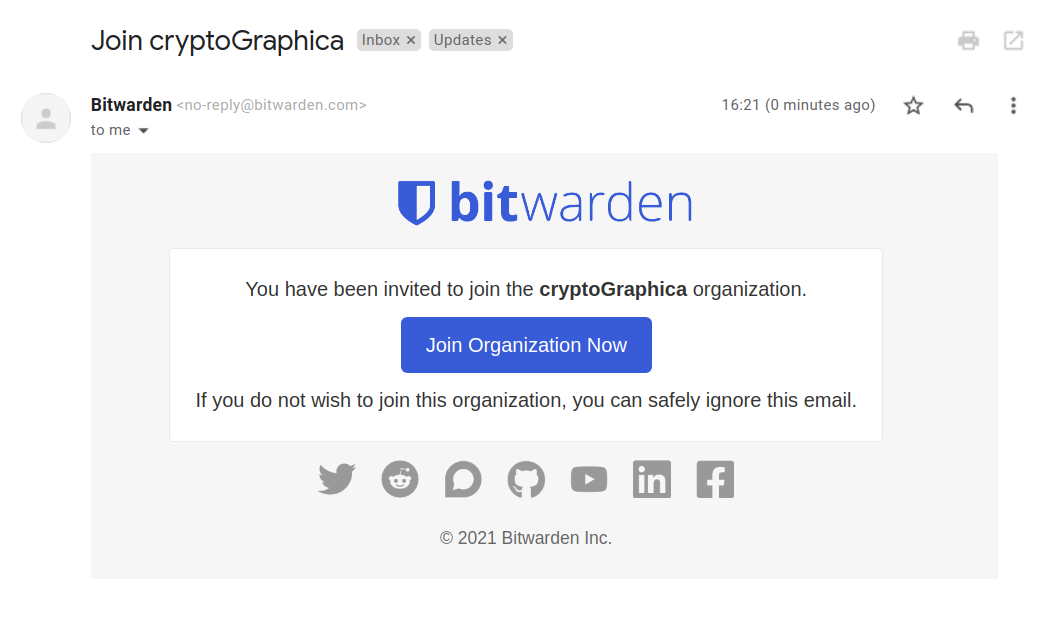
Then select "Create Account" after clicking "Join Organisation Now" in the email.
- If your organisation is using the Free Basic Plan, all the staff are setting up their own accounts, and you can start by Creating an Account.
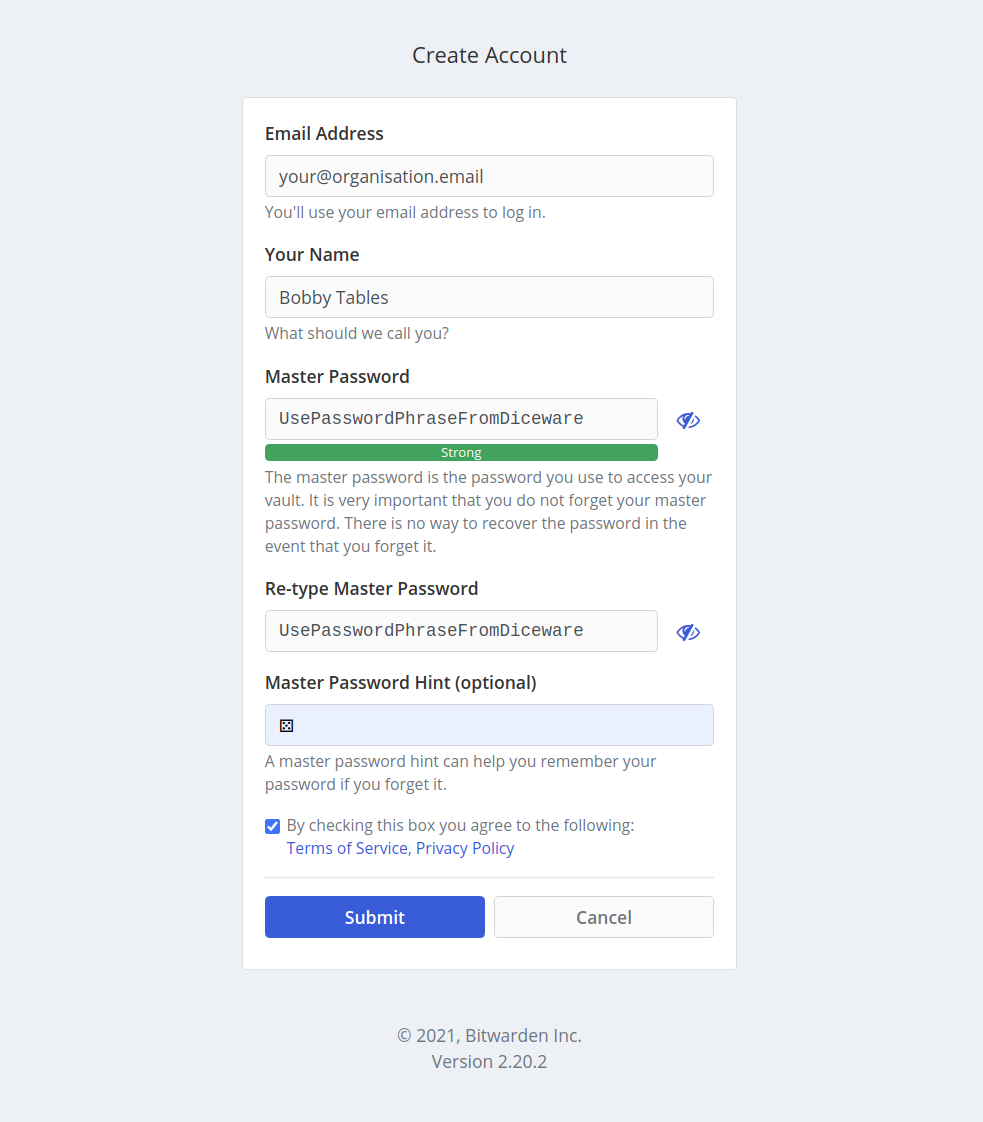
- In the Create Account screen,
- Use your work email as the "Email Address"
- Fill our "Your Name"
- Use your Diceware passphrase as your "Master Password"
- Re-type the master password
- Create a hint for your Master Password.
- Check the Terms of Service, and click "Submit"
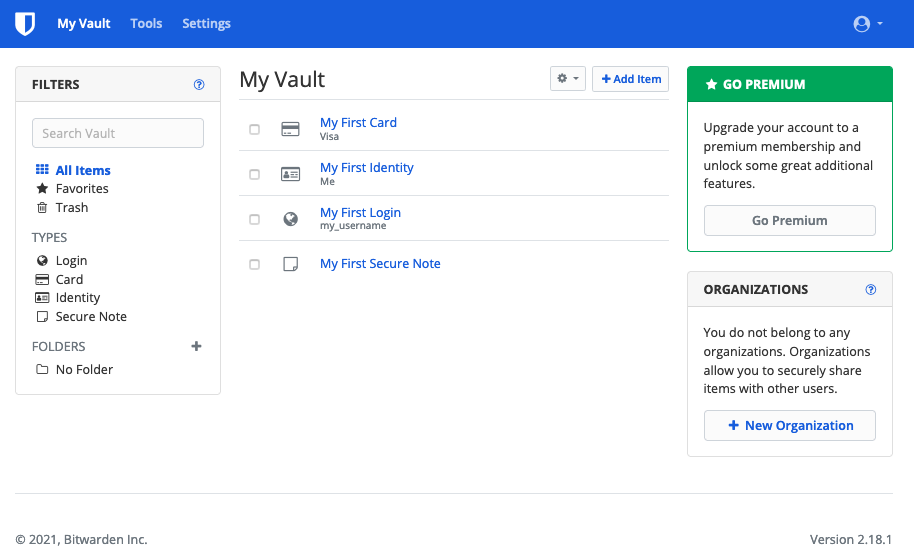
2. Login to your Vault
Congratulations! You're now ready to login to your vault.
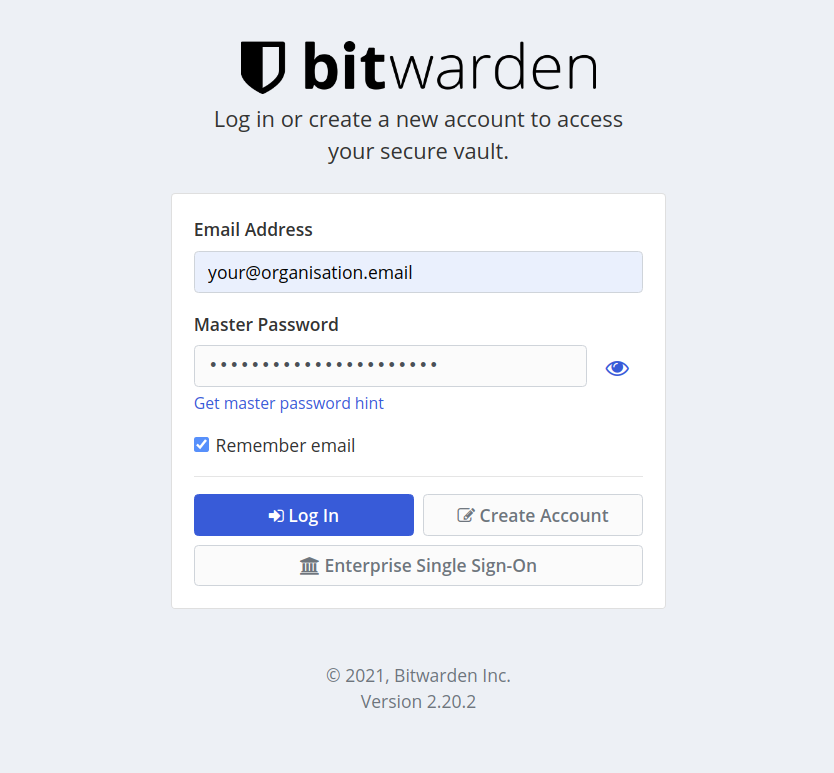
It should look like this:
3. Set the Security Options
From the Web Vault, go to Settings > Options
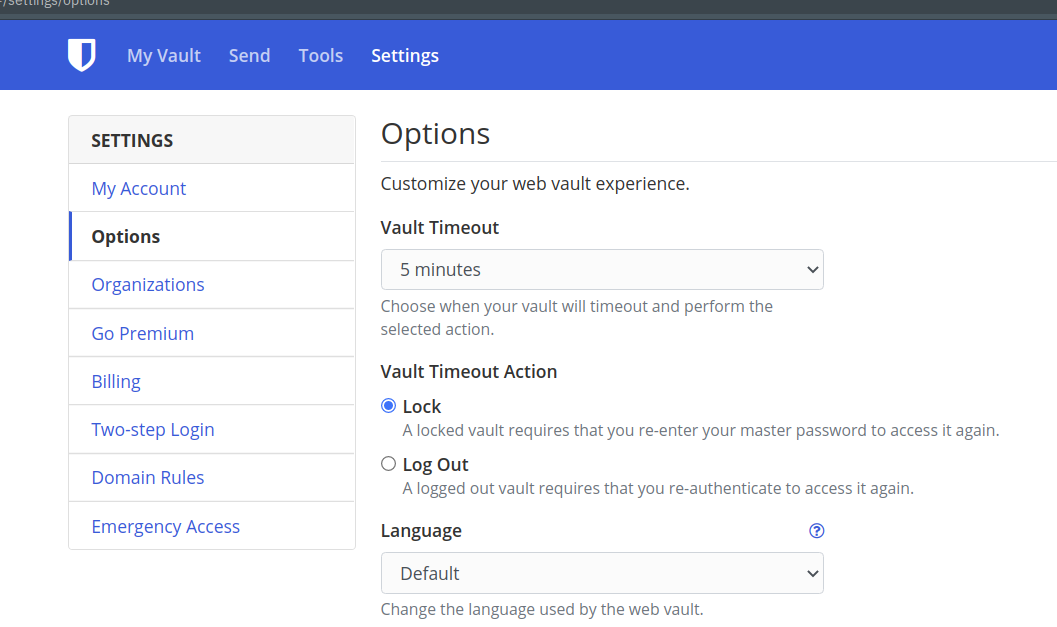
- Set the "Vault Timeout" to the lowest time-out you can use without being annoyed about re-entering your password after inactivity.
- Suggest to leave the "Vault Timeout Action" to "Lock"