💻/🖥️ Manage sensitive files in VeraCrypt
| TYPE | AUDIENCE | PRIORITY | COMPLEXITY | EFFORT | COST | UPDATED |
|---|---|---|---|---|---|---|
| Conduct | 🧑 | ⭐⭐⭐⭐⭐ | ⭐⭐ | 🧑 | 🆓 | 2021-06-23 |

Instructions
What you should know
- Until you open your "vault", it just looks like a file that is just as large as it was defined at creation, and carries any name and extension that you may give it.
- The file itself cannot be opened by any conventional programme, so there is no way of "opening up the file" to see what's inside without knowing the password
- "opening the files" is done by "mounting" the file with VeraCrypt, which means that it creates a virtual drive on your computer with the clear (unencrypted) version of your files available through that drive while the hidden (encrypted) version of the files are stored inside of your vault.
- In order to mount a vault, its encryption password needs to be provided. Without the password there is no way to gain access.
- This guide is for hidden vaults, but if you have a standard vault, you can still follow this guide by following "1. Open your hidden Vault" and "2. Close the hidden Vault" and ignoring any mention of "hidden".
What you should prepare
- This guide assumes that you have VeraCrypt installed and that you have created a hidden vault with VeraCrypt.
What you should do
In this guide we are continuing with the hidden vault we created as part of the 💻-🖥️ Create a Hidden Vault with VeraCrypt instructions, this means that our vault is:
- A Hidden VeraCrypt volume
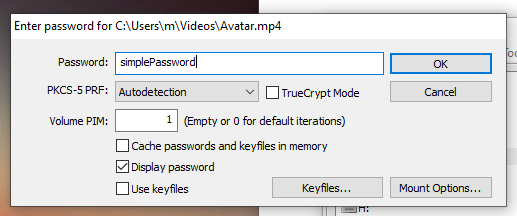
3 GBin size for the outer volume,2700 MBfor the hidden volume- named
Avatar.mp4 - stored in the user's
Videosfolder - has a outer volume password :
simplePassword - and a hidden volume password :
K6saHmLYy8Q7ozDuLyzaDwNmWxgVEyNEnchi86MWHoPnmnd7N7zoxRNcNZT9Lqhr - The default PIM for the outer volume, a PIM of
1for the hidden volume.
You setup will (and should!) have all different values depending on your needs - but this is what we'll use below.
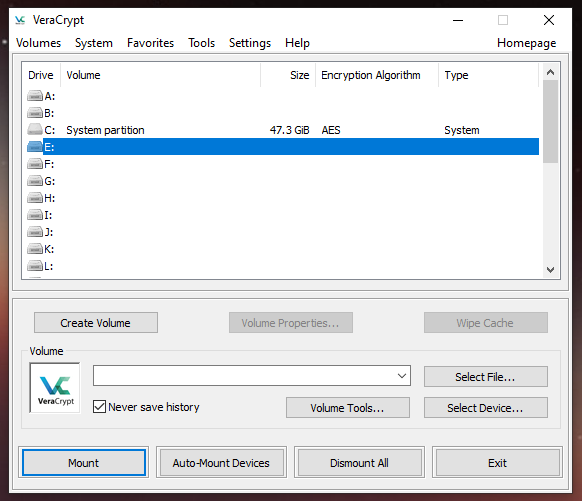
1. Open your hidden Vault
The process of "opening" a vault is called "mounting".
To open our files to be accessed and modified, we first need to :
- Open VeraCrypt
- Click "Select File"
- Navigate to where your vault is stored
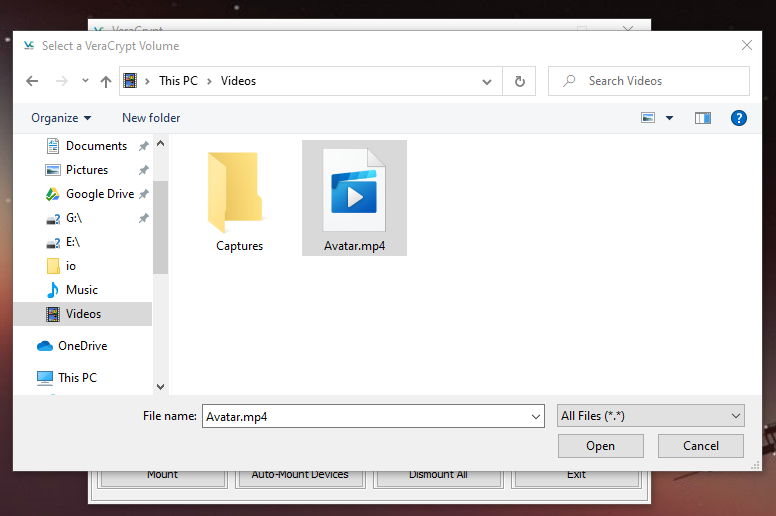
- Select the file and click "Open"
- Select an available drive letter, for example "E:\"
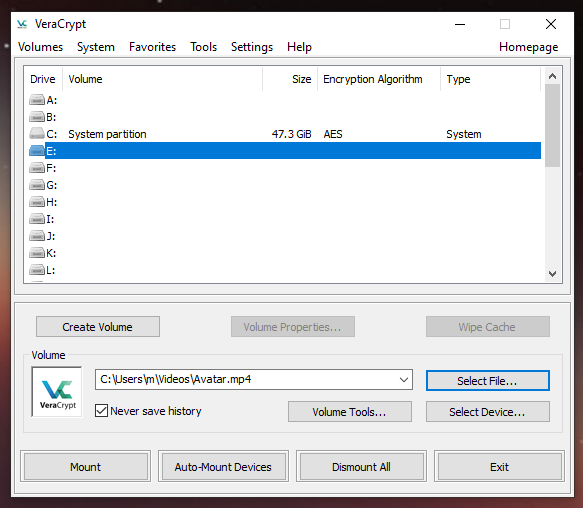
- Click "Mount" - the password prompt will pop up
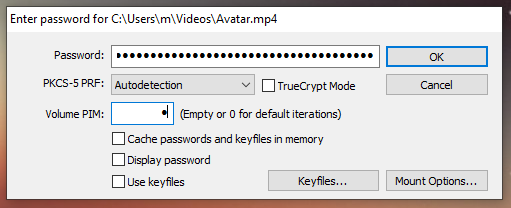
- Enter the password for the hidden vault - which should be retrieved from Bitwarden by copy / pasting it.
- If you have set a PIM (and ONLY if you have used a PIM - you would have set this if you followed the previous guide and your computer is slow), select "use PIM", and set 1, or whatever PIM you provided before.

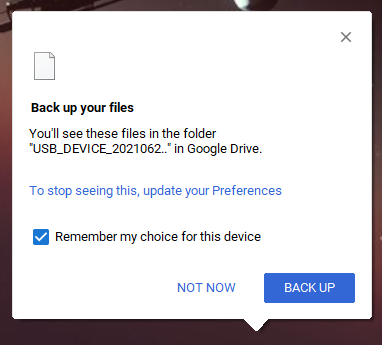
- IMPORTANT If your Backup and Sync prompt you with the message below, be sure to click "Remember my choice for this device" and click "Not Now" - definitely DO NOT select back up, because you would be copying your clear files to your google drive, negating the encryption provided by the vault.
- VeraCrypt will now show that a Hidden volume had been mounted
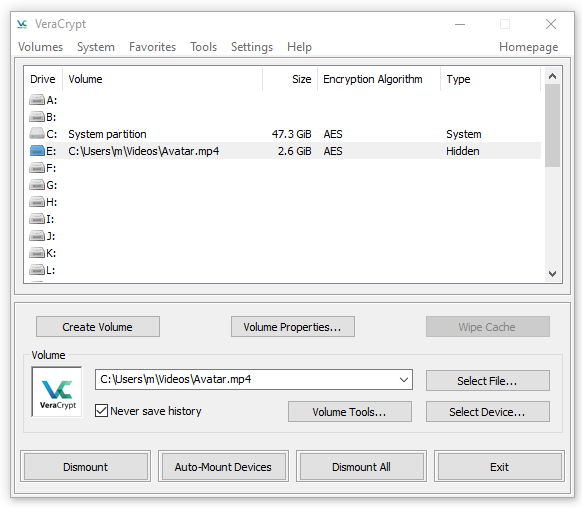
- Double click the line in VeraCrypt with your vault, to open the mounted drive.
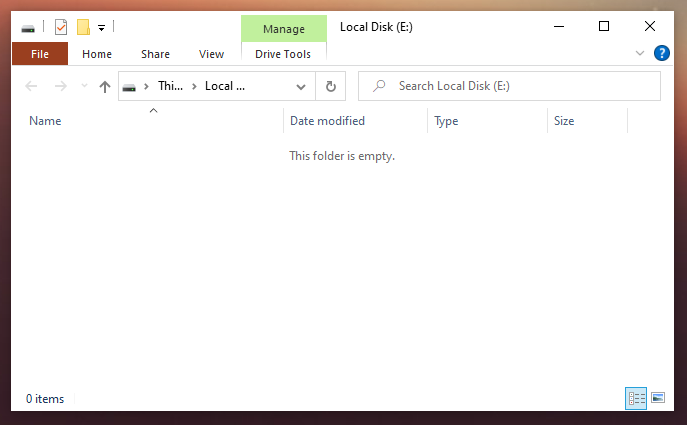
- If this is your first time accessing the vault, it will just appear as an empty drive.
You can now continue to use it like you would normally use a USB drive, dragging and dropping files in, copy and pasting them in, or creating them in place.
2. Close the hidden Vault
The process of "closing" a vault is called "dismounting"
- Open VeraCrypt
- If you only want to lock a single vault, select the vault you want to lock and click "Dismount", of if you want to lock all open vaults, click "Dismount All"
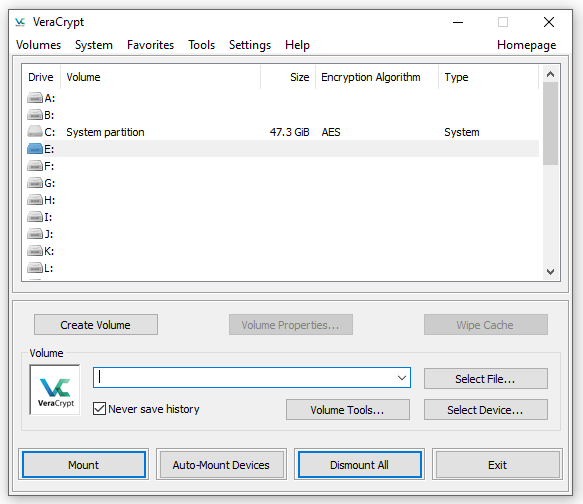
- The vault you wanted to lock should no longer show up.
- Click "Exit" to finish
Remember, only when your vaults are locked are your files secured! Just like a regular vault, if it is open, people can get access without any additional keys (i.e. passwords).
Important: Always lock your vaults before turning off your computer, or leaving your computer unattended.
3. Open your outer Vault ... when you are forced to
The purpose of a "hidden folder" is to allow you 🔒 Plausible Deniability in case you are under pressure to share your passwords with someone. In short, by looking at the vault file, a person may understand that it is a vault, no matter what you named it, especially if they find VeraCrypt on your system. Yet, VeraCrypt works in a way that whomever is forcing you to share your passwords can not know whether the password you have given them is for your outer vault, or your hidden vault!
So if you have a believable outer vault (i.e. there is some information in there which you would hide, but it is not as incriminating or problematic as the information in your hidden drive), then there is no way for the person pressuring you to know that there is another vault if you only give them your outer vault password.
In practice, when the open vault is opened, the remaining space (some of which you may have used to write your sensitive files), will be reported as "available space", so there is no way to discover that there are still files hidden in that available space. But this also means, that if you don't take precautions, writing files to that available space will damage the files stores in that space and possible corrupt them forever.
The idea is that you would much rather lose the files than share them with your adversaries, so this is an acceptable trade-off. However, if you aren't being forced to reveal your passwords, you can still safely use your outer vault, but as this would disclose that there actually is a hidden vault, you wouldn't do this in front of a person who should not know that you have a hidden vault.
In this section, we'll go through the steps to open up your outer vault without revealing that you have a hidden vault, i.e. these are the steps you should follow if you are being forced to share your passwords but don't want to share your hidden vault's password:
- Open VeraCrypt
- Click "Select File"
- Navigate to where your vault is stored
- Select the file and click "Open"
- Select an available drive letter, for example "E:\"
- Click "Mount" - the password prompt will pop up
- Up until now, the steps were exactly the same as your hidden vault, but by entering the password for the outer vault - which you should ideally retrieve from memory or have written down on a note - the outer vault will reveal itself instead of the hidden vault.
- VeraCrypt will now show that a "Normal" volume has been mounted.
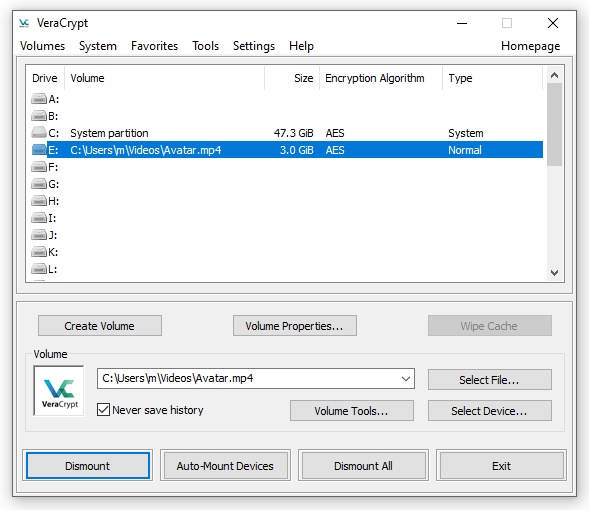
- Double click the line in VeraCrypt with your vault, to open the mounted drive.
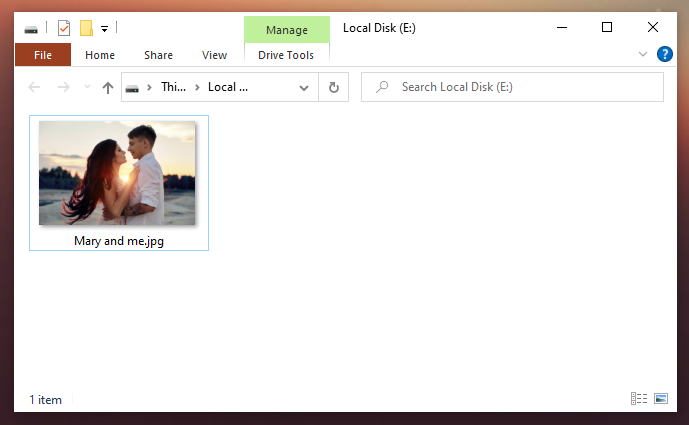
- This vault now shows the "outer contents" - in the example, it's a photo of a couple which they might believable want to keep private.
Important: As you may need to be able to perform these steps while in an intimidating environment, we suggest that you regularly practice opening your outer vault, just to make sure you remember the steps, and equally important, remember your weak password by heart. We recommend that you set yourself weekly reminders until you can perform the steps flawlessly, and then move to bi-weekly or monthly reminders.
4. Open your outer Vault ... when you want to update the files
As explained in the previous section - if you want to modify files in your outer folder, you need to take a special precaution that "marks" all the space your hidden files are taking up so that you don't accidentally overwrite them while you are modifying or adding files in your outer volumer.
In the same steps as above, up until the entering of the password:
- Click "Mount Options"
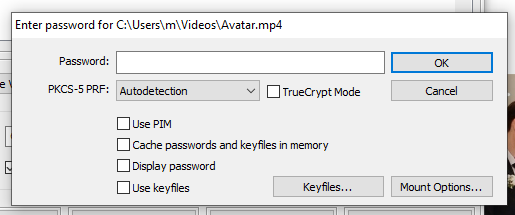
- Check "Protect hidden volume..."
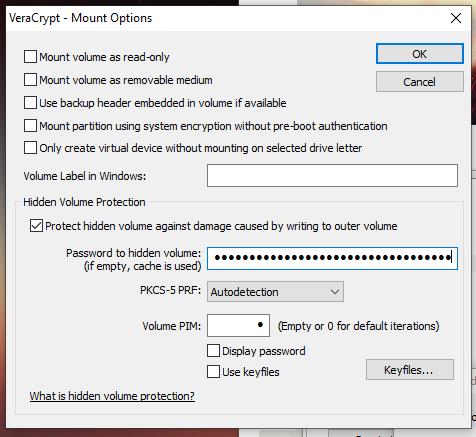
- Enter your hidden vault password under "Hidden Volume Protection"
- Enter your hidden volume PIM if you have one under "Hidden Volume Protection"
- Click "OK"
- Enter the password for your outer volume

- Wait a bit and you should see a message pop up "The hidden volume is now protected" - the rest of the warning explains that you should not put in more files into the outer volume than the space you assigned for it (in our example
3GB - 2700MBor roughly 300 megabytes) 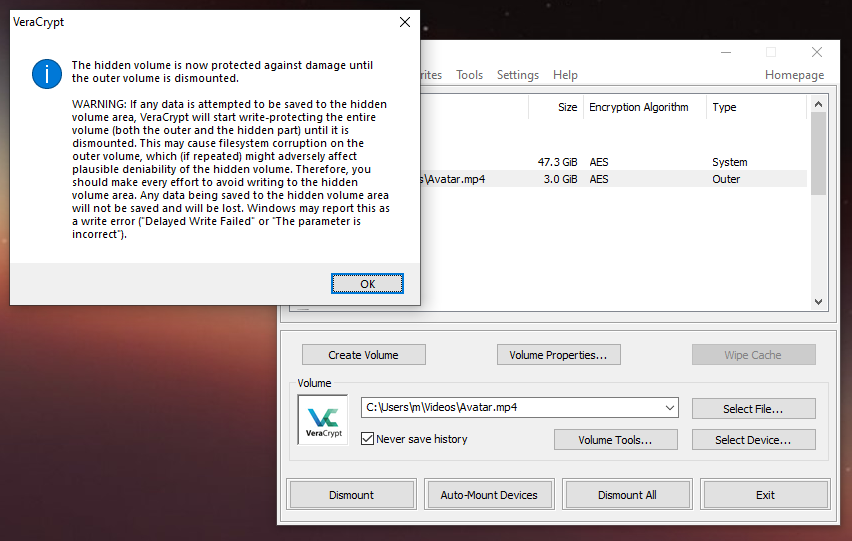
- In VeraCrypt, the type will now say "Outer" instead of "Normal" or "Hidden".
The main reason why you would want to open your outer volume with this method is because you want to update your files here so that they stay recent and relevant. They only way that someone investigating you can reasonably assume that your outer volume isn't what's really being hidden is if your files are unreasonably outdated:
- The best way to counter that is by using files that won't age (such as family photos or romantic photos).
- The second best way is to replace those files with more recent ones (e.g. non-sensitive project files), but remember never to add more files than the space you had allowed for
- Finally, you can open and edit the file so that the timestamp is updated - you can then point at the "look! I recently looked at this document / photo" or "see! it was still being worked on two weeks ago!"
Once you're done updating your fake "outer" volume files, as always, "Dismount" and "Exit" VeraCrypt.