💻/🖥️ Windows 10 - Turn on Full Disk Encryption
| TYPE | AUDIENCE | PRIORITY | COMPLEXITY | EFFORT | COST | UPDATED |
|---|---|---|---|---|---|---|
| Preparation | 🧑/🏗️ | ⭐⭐⭐⭐⭐ | ⭐⭐ | 🧑 | 🆓 | 2021-06-17 |
Rationale
Without "Full Disk Encryption", a hard drive can simply be placed into another computer, and you wouldn't even need to have the user's windows passwords to access the files. This is undesirable, so we recommend adding "Full Disk Encryption" as a defence against this.
Instructions
What you should know
- Windows 10 sometimes uses encryption by default, and sometimes does not.
- Sadly, only Windows Professional, Enterprise, and Education editions have built in encryption tools - if you use any of the other editions, you will not have the Bitlocker functionality required for built-in full disk encryption. In that case, you should use 💻-🖥️ Encrypt Internal Drives with VeraCrypt instead.
- You also need to use a Microsoft Account if you want to make use of the built-in encryption feature.
What you should prepare
Check whether your computer already has encryption turned on:
- Open the "Settings" app,
- Navigate to System > About
- Look for a “Device encryption” setting at the bottom of the About pane.
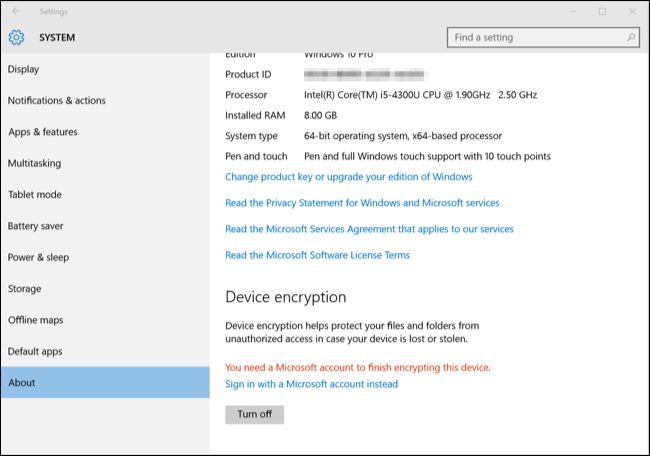
- If you don’t see anything about "Device Encryption" here, your PC does not support built-in Device Encryption, and so it is not enabled. Look at how to 💻-🖥️ Encrypt Internal Drives with VeraCrypt instead.
- If Device Encryption is enabled - or if you can enable it by signing in with a Microsoft account — you’ll see a message saying so here.
If encryption is turned on you don't have to complete any further steps, if you can turn it on by signing into your Microsoft account, do so.
What you should do
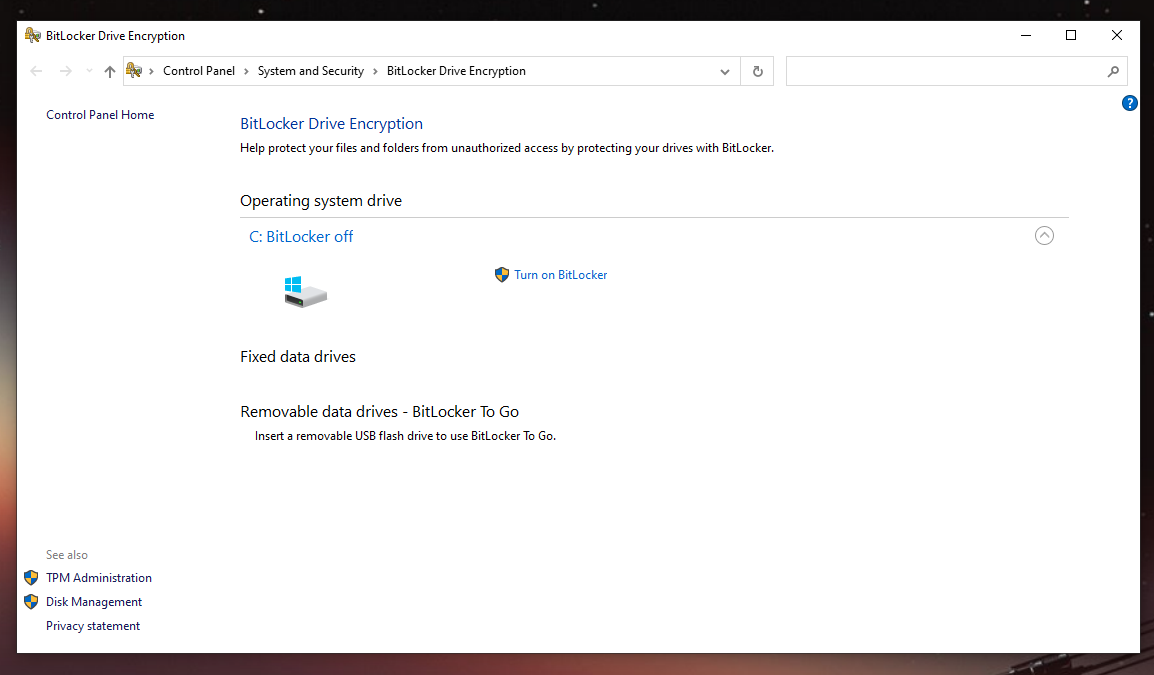
- Search for “BitLocker” in the Start menu and use the BitLocker control panel to enable it.
Troubleshooting
- If you get the following warning message - it means you don't have the required hardware component to setup BitLocker without using an additional USB Flash Drive.
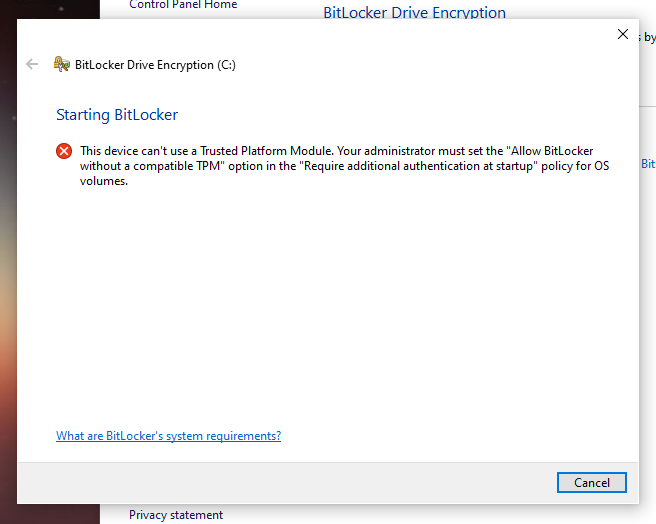
- Instead you will need to use an external application called VeraCrypt to perform the encrypt process. Follow the steps to 💻-🖥️ Encrypt Internal Drives with VeraCrypt.
Sources : How To Geek