💻-🖥️ Safely Delete Files (Unrecoverable)
| TYPE | AUDIENCE | PRIORITY | COMPLEXITY | EFFORT | COST | UPDATED |
|---|---|---|---|---|---|---|
| Conduct | 🧑 | ⭐⭐⭐⭐ | ⭐⭐ | 🧑 | 🆓 | 2021-08-06 |
Rationale
When you delete a file on a computer, it's actually only 'hidden' from the system until that disk space is used again by some other file. So to ensure that when you delete files they are removed without the possibility of retrieving them, you need to overwrite that disk space that previously stored the file. Luckily there are software utilities that can help you perform this cleanup task.
Instructions
What you should know
- Because the purpose of these steps is to securely delete files, it will not be possible to recover them after you've erased them through this method. I.e. there is no recycle bin where you can recover your files from.
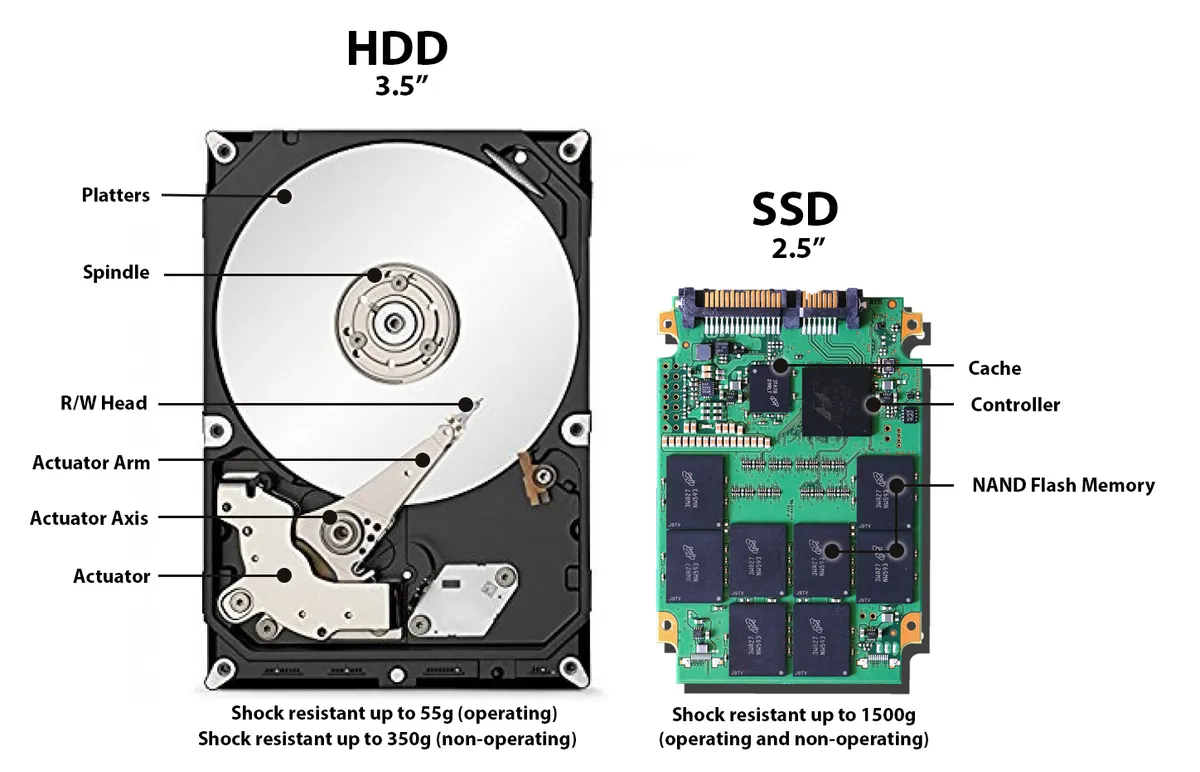
- There are two popular types of storage devices, magnetic disks (AKA Hard Disk Drives or HDD) and flash memory (AKA Solid State Drives or SSD). The difference is important as the way they handle deletion of files is different, and we'll provide different steps for each.
What you should prepare
As the recommended steps depend on the kind of drive you have, the preparation steps will help you understand which drive(s) you will be securely deleting your files from.
1. Determine whether your files are stored on an internal, external or thumb drive
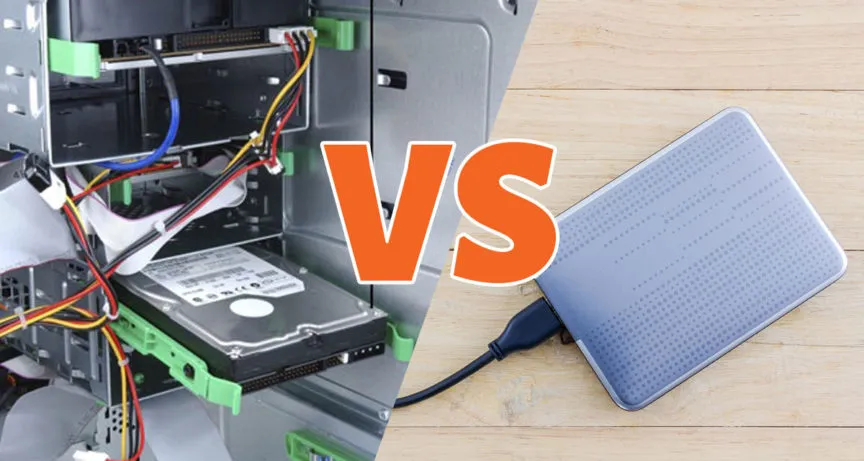
If the drive that stores your data is "external" to your computer, meaning that you could unplug it without opening up your computer, you have an "External" drive, otherwise you have an "Internal Drive".
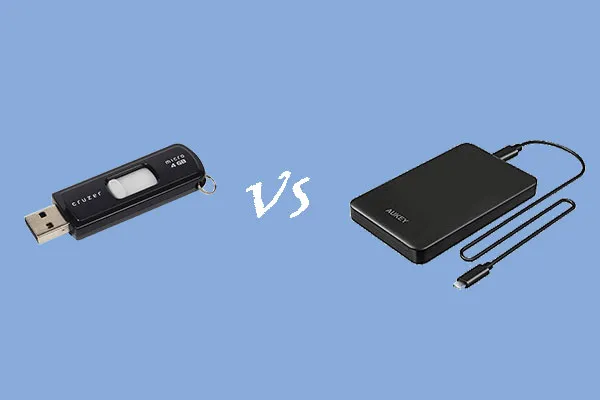
For an external drive, if it is roughly the size of a finger or smaller you have a "Thumbdrive" (left picture above), if it is at least 6 CM wide you have an "External Drive" (right picture above).
External Drives are treated the same as Internal Drives, but Thumb drives have a special treatment. You can skip the remaining preparation steps is you have a thumb drive.
2. Determine whether your drive is an SSD or HDD
If you have an USB Thumb Drive, you may skip this step.
How do you know whether your drive in an HDD or an SSD?
If you are unsure and are using Windows, you can follow WikiHow's guide to How to Check if a Hard Drive Is SSD or HDD on Windows.
For Macbooks - go to "About this Mac" on the top left of the screen in the Apple menu. Click on the Storage tab. This shows all attached drives. For SSD it shows as "Flash Storage".
3. If you have an SSD, determine whether TRIM mode is or can be enabled
If you have an HDD or USB Thumb Drive you may skip this step.
Some SSDs are run with TRIM mode enabled, which means that when you delete a file, the drive also schedules the data to be erased.
If TRIM is not supported or activated for your drive however, when you delete a file, the drive protects the data and only truly erases it after lots of data has been written to the drive.
See the steps below for either Windows or macOS on how to check your SSD's TRIM status, and to switch it on where possible.
advanced 👩💻 - This feature is called 'wear leveling'. It's meant to prolong the lifespan of the drive as it ensures that all the cells that make up the storage space are used an 'equal' number of times. So only when all the "free space" cells available at the time when you delete a file are written to, will the cells which contain your 'deleted file' actually be overwritten and does the data become irretrievable.
How to see if TRIM is enabled in macOS
- Launch "System Information" - The easiest way to access it is to click the Apple menu while holding down the Option key on your keyboard.
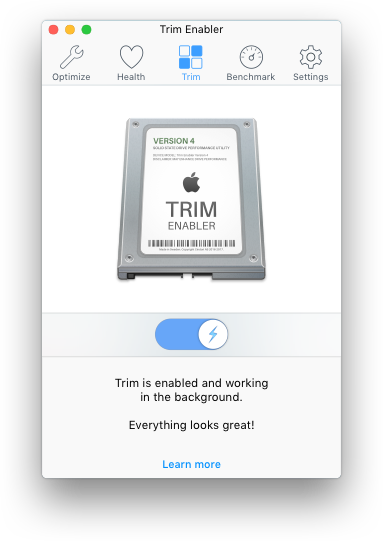
- Find the "SATA section" in the menu and locate your SSD. As shown above, the description will tell you whether TRIM is enabled.
How to enable TRIM in macOS
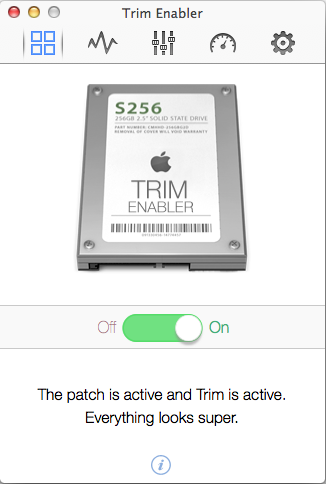
Download the free copy of Trim Enabler 4, launch it, and flip the switch from "off" to "on" to safely turn TRIM on for your SSD.
How to see if TRIM is enabled for SSD in Windows 10
The following steps summarise the guide by Winaero
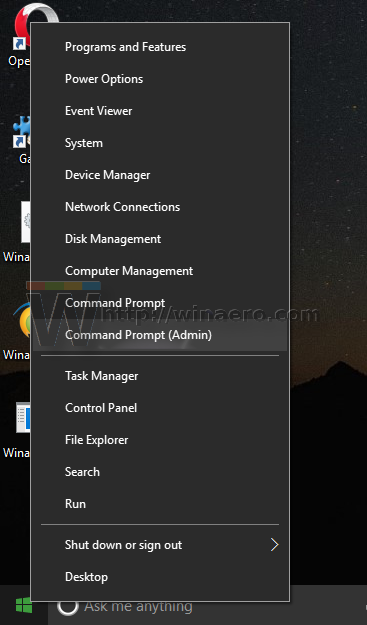
1. On your windows 10 machine, press "WIN + X" to bring up the power user menu
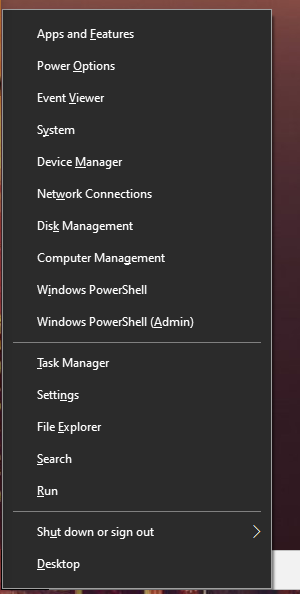
2. Select "Windows PowerShell (Admin)" or "Command Prompt (Admin)"

3. Type or copy paste the following command, and press ENTER
fsutil behavior query disabledeletenotify
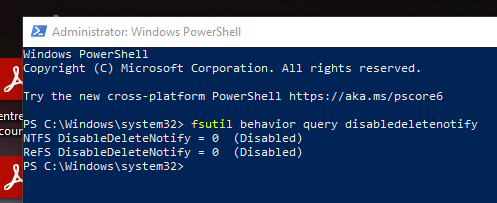
4. Each drive will be listed separately. If you see 0 (zero) in the column for DisableDeleteNotify, this means that TRIM is enabled for that drive. It you see a 1, it is not enabled.
See whether you can enable TRIM on Windows 10
If any of your SSDs show 1 in the DisableDeleteNotify column of the previous step, you will want to attempt to turn TRIM on.
In the same window as above (i.e. either PowerShell or Command Prompt):
- Type or copy paste the following command, and press
ENTER
fsutil behavior set disabledeletenotify 0
This will enable TRIM support for the solid state drive which support it. Check to see which of your drives now have TRIM enabled.
4. If you have an SSD without TRIM, determine which measure is right for you
If you have an HDD, USB Thumb Drive or an SSD with TRIM enabled, you may skip this step.
Without TRIM, there is no way to securely overwrite the SSD storage cells that hold the file you want to delete. On an SSD without TRIM, it is thus possible for someone with technical skills, to retrieve the files you have 'deleted' - even if you use a "shredding" or "erasing" tool to delete a particular file.
To ensure that your deleted files are no longer retrievable, you have two options, using Encryption or Erasing Free Space. You will want to choose one of these methods to be able to safely delete your files on an SSD without TRIM.
Use Encryption
File Encryption means that even if someone gets physical access to your drives - the data that is stored on them is meaningless without the decryption password. So even before the data is deleted it looks like random data on the drive itself, so we no longer have to worry about your drives simply "hiding" your deleted files. So by encrypting your data, it effectively protects your files from being retrieved if your devices are confiscated without your encryption password.
You can either decide to encrypt your entire drive, so you don't have to ever think about whether a file should be encrypted or not, or you can create a 'vault', which would only contain your sensitive files. We recommend encrypting your entire drive. If you don't, it's possible that, e.g. when opening sensitive word documents, Word would create temporary files outside of your Vault which would be stored unencrypted, and even if you deleted the original file / made sure the encrypted vault was secured, the temporary file could still be accessed from the drive.
If you choose encryption:
- To encrypt the whole Internal Drive, follow the steps in 💻-🖥️ Encrypt Internal Drives with VeraCrypt.
- To encrypt the whole External Drive, follow the steps in 💻-🖥️ Encrypt External Drives with VeraCrypt.
- To only encrypt a portion of your storage, follow the steps in 💻-🖥️ Setup an Encrypted Vault.
Regardless of which option you choose, you can abandon this guide. If you however are concerned that you might be forced to surrender your password, it is better to use the next option.
Erase Free Space
Instead of only deleting the file / folder you want to delete, you can also "delete" all the 'free space' on the SSD, by writing nonsense data to it. This ensures that the file cannot be retrieved, but this process that takes up (computer) time, degrades the performance of the drive while performing the process, and shortens the life-cycle of the drive. Roughly, if you use this method for a year, it shortens the life-span of the drive by 10%).
The idea would be to schedule a task on your computer so on a daily basis all the "deleted files" are truly erased.
What you should do
Depending on what you discovered during the preparation steps:
- On Windows with an Internal or External SSD with TRIM, follow steps
AandX - On Windows with an Internal or External SSD without TRIM, follow steps
B,CandX - On Windows with an Internal or External HDD, follow steps
B,DandX - On Windows with an USB Thumb Drive, follow steps
BandE - On macOS with an Internal or External SSD with TRIM, follow step
AandY - On macOS with an External HDD or USB Thumb Drive, follow step
FandY
Note the Apple hasn't used HDDs in their notebooks since 2012, and unless you are using an after-market SSD in your macbook, the Apple installed SSD will have TRIM enabled.
A. Deletion on Windows/MacOS + SSD with TRIM
With TRIM, an SSD schedules a task to erase the underlying data as soon as you delete a file from your system. However, when exactly that task runs depends on the SSD model you have, and how many files you have deleted.
Typically, if your system is idle, i.e. you are not using it, the SSD will use that time to properly erase your files. It's impossible to know how much time it takes for this process to complete, but as a rule of thumb you can use 10x times the time it would take to copy a file. So, for example, if it takes 5 seconds to copy a file, leaving it idle for 50 seconds would be reasonable to expect the SSD's scheduled erasure task to have securely erased the data.
If you are working with highly sensitive data however, we recommend encrypting your data through an Encrypted Vault or fully Encrypted Drives.
B. For Windows, install Eraser
If you are using Windows, first setup Eraser, a free utility for securely deleting files:
- Download Eraser from the official source - click on the most recent entry under "Build Name".
- Install Eraser by opening the file you just downloaded, and following the instructions
- Launch Eraser and select Settings - make sure the option to "Integrate Eraser Into Windows Explorer" is enabled.
C. Deletion on Windows + SSD without TRIM, Erase Free Space option
If you have chosen the "Erase Free Space" over "Encryption" for your SSD which does not support TRIM, you will want to setup a scheduled task which erases all the "free space" on your drives so that your deleted files are erases as well.
If you've chosen the 'Erase Free Space' method, follow these steps to Create a Task in Eraser
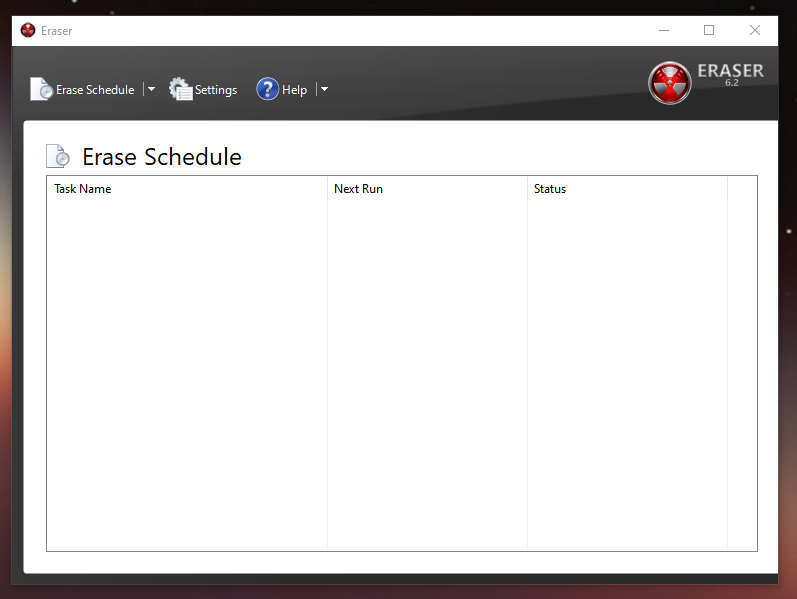
1. Launch "Eraser", it will open up to an empty "Erase Schedule" view
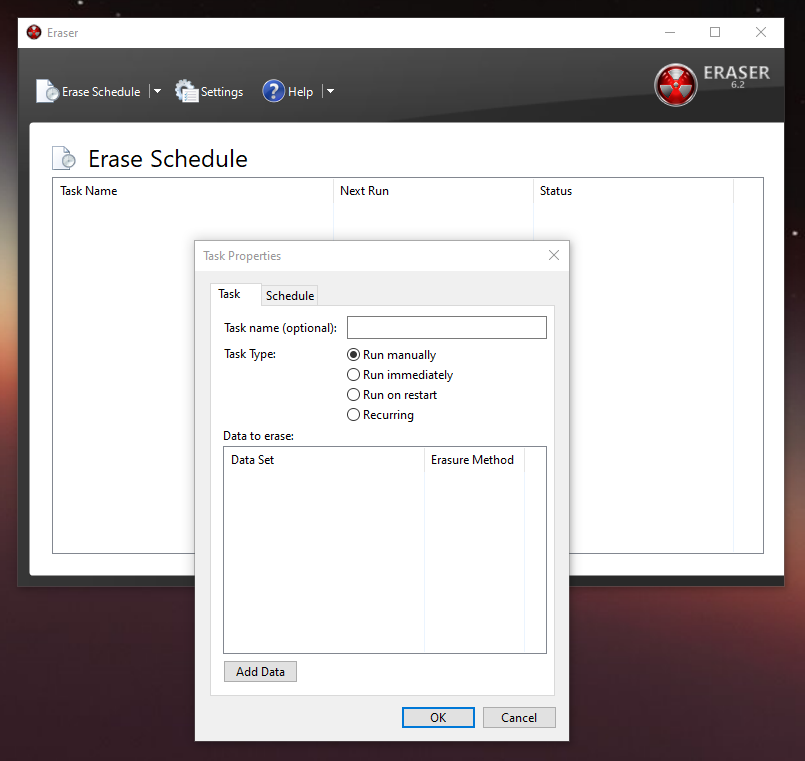
2. Add a task by clicking the drop-down arrow next to the "Eras Schedule" button, and select "New Task"
3. Give the task a descriptive name, e.g. "Permanently erase deleted files"
4. Select "Recurring" for Task Type
5. Click "Add Data"
6. Select "Unused Disk Space" for the "Target Type", keep the Erasure method as default or set it to "Pseudorandom Data (1 pass)" which is the default.
7. Select the drive you want to securely erase all your deleted files from, keep "Erase cluster tips" checked, Click OK
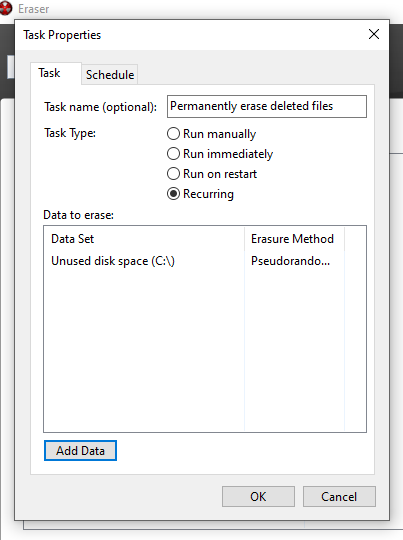
9. You should now have settings similar to the above. Click "Schedule" tab.
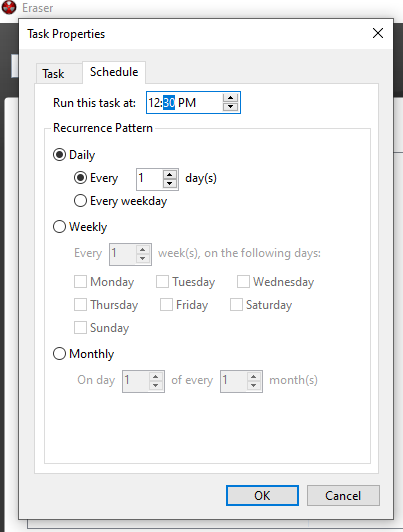
11. Select the time when to run this process. As it can take quite long to complete, you may want to run it after work hours, or during your lunch break, for example daily at 12:30. Click OK.
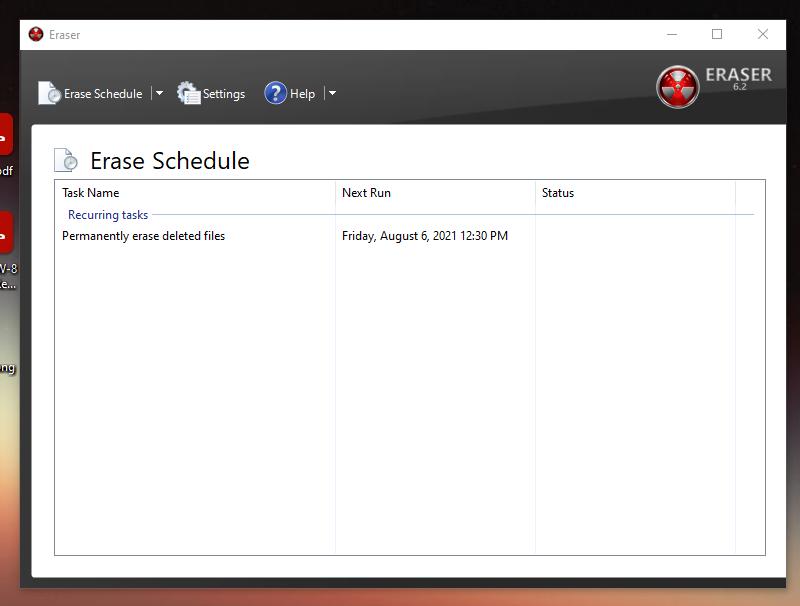
12. That's it! Your Eraser schedule is now setup to run daily and permanently erase delete files from your SSD.
D. Deletion on Windows + HDD
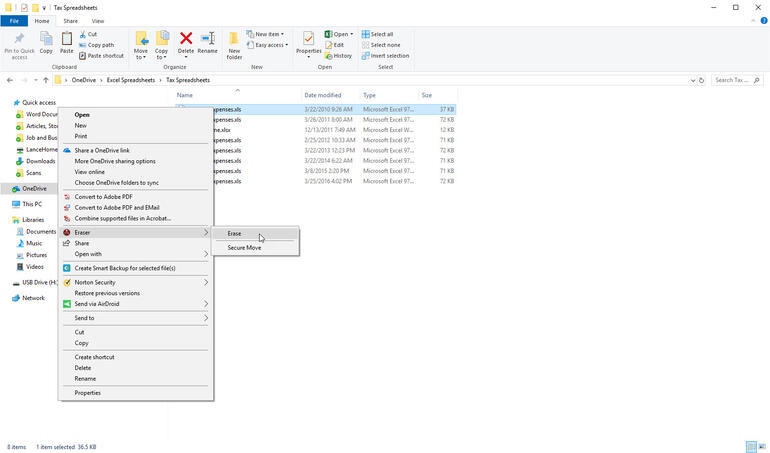
Now if you ever want to securely delete a file or folder, instead of "deleting" it or dragging it to the recycle bin
- Launch "File Explorer" - i.e. the programme that lets you navigate your files
- Navigate to the file / folder you want to delete.
- Right-click on a file / folder you wish to remove, hover over the "Eraser" menu entry, and in the sub-menu click "Erase"
- Eraser will prompt for confirmation to erase the file. Click "Yes", and then the file is deleted, without the ability to retrieve it.
E. Deletion on Windows + Thumb Drive
We would highly recommend that you opt to 💻-🖥️ Encrypt External Drives with VeraCrypt, but if encryption isn't an option for you, you can also manually ensure that the deleted files on your Thumb Drive are no longer retrievable:
- Plug your Thumb Drive into your computer.
- Launch "File Explorer" or "This PC" - i.e. the programme that lets you navigate your files
- Navigate to "This PC" - where you can see all your drives
- Right-click on your Thumb Drive - usually it's
D:/orE:/
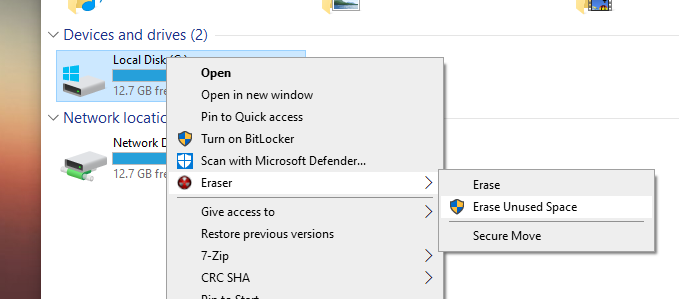
- Hover over "Eraser", and select "Erase Unused Space".
- Click "YES" when asked to confirm whether you want to erase unused space on the drive.
- It will take a very long time to complete, but once it is completed, you will be presented with a "Erasing Report"
If this process is too cumbersome, we recommend using drive encryption instead, which does not require this time consuming erasure process, but instead relies on your to keep the encryption password secure.
F. Deletion on macOS + Thumb Drive / External HDD
External HDDs and Thumb Drives don't securely erase your files when you delete them, making it very easy for someone to recover if they confiscated your drives. To prevent this, follow these steps whenever you want to ensure your deleted files are irretrievable:
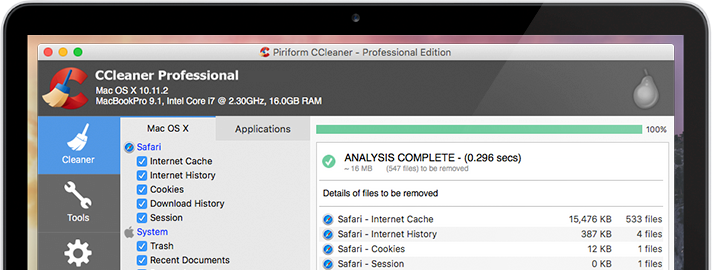
1. Download and install CCleaner for Mac - the Free version is sufficient
2. Launch "CCleaner"
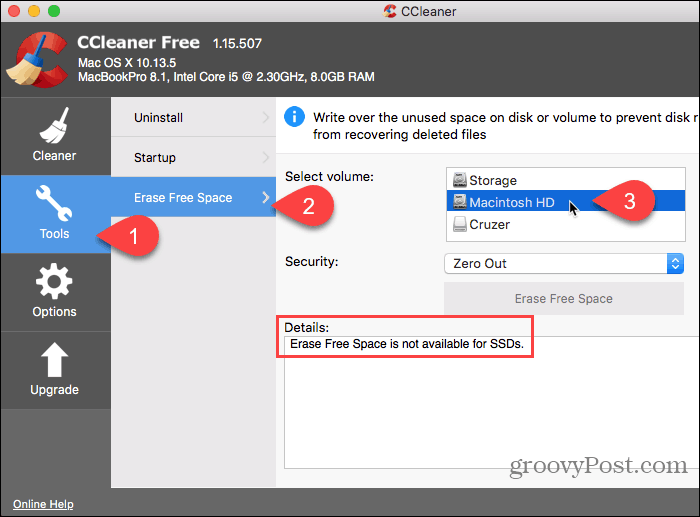
4. Click "Tools" on the left menu
5. Click "Erase Free Space" in the middle pane
6. Select the Thumb Drive / External HDD you want to securely erase the deleted files from
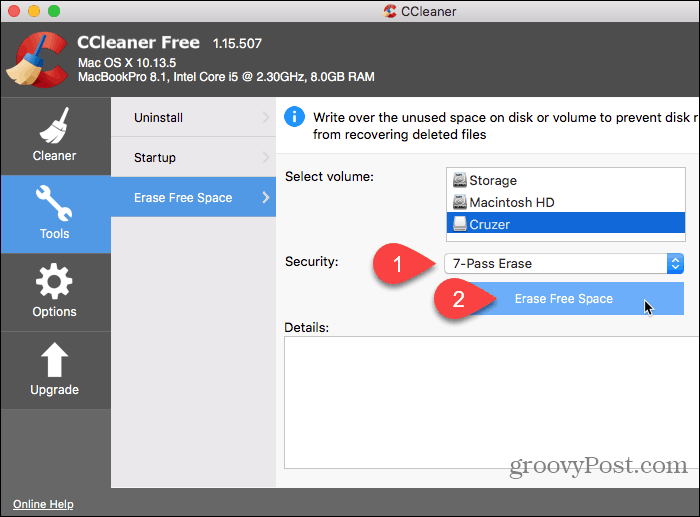
8. Select "Zero Out" as the Security option
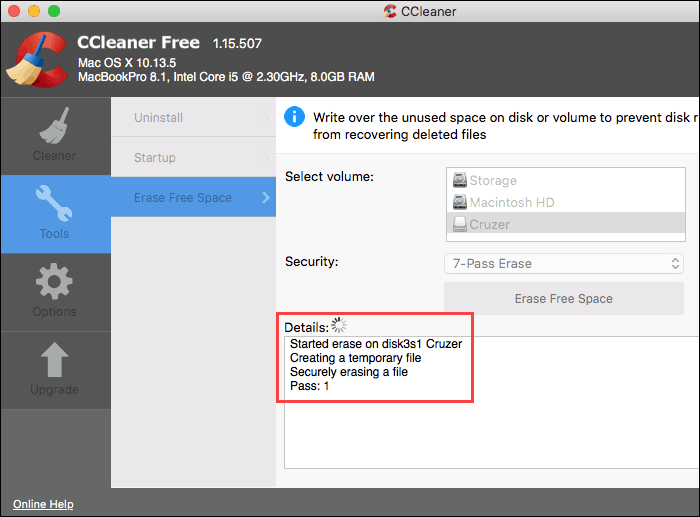
9. Click "Erase Free Space" - It will mention that it can take several hours, if you accept, click "Yes" for the process to start.
It may take a while before the process is completed, but you will be kept up to date in the Details pane as shown below
X. Turn off the Recycle Bin on Windows
While this step is optional, it is advised to reduce or completely stop using the Windows Recycle Bin, as you would not want to accidentally keep your sensitive files available there, after you attempted to delete them.
This does mean that you will have to be more careful when deciding when and what files to delete, but online copies and frequent back-ups are a better way to mitigate accidental deletions than keeping your files in your recycle bin.
You have three options here
1. Use SHIFT+DELETE to delete sensitive files
Instead of selecting a file and pressing 'DELETE' when you want to erase it, you can press 'SHIFT+DELETE' which bypasses the Recycle Bin. This effectively means that the files won't be recoverable if you have followed the previous steps.
Note that this is prone to user error as you might accidentally 'DELETE' a file when you meant to "SHIFT+DELETE" it, thus keeping a copy in the recycle bin.
2. Schedule a Task in Eraser to Empty the Recycle Bin
If you followed steps B and C above, you could also add a daily tasks that erases the recycle bin, following the instructions from C but selecting Recycle Bin instead of "Empty Space"
This is a reasonable method as it would provide you up to 24 hours of recovery time if you had accidentally deleted a file.
3. Disable the Recycle Bin
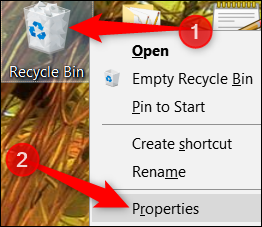
1. Right click on the "Recycle Bin", and click "Properties"
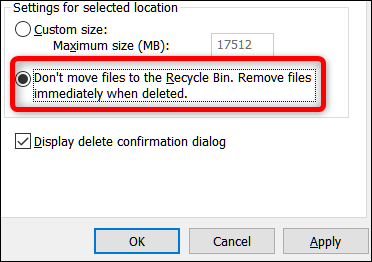
2. Select the “Don’t move files to the Recycle Bin. Remove files immediately when deleted.” option.
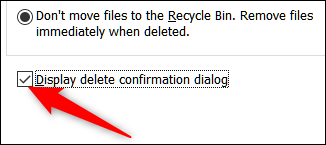
3. To protect yourself from accidental deletions, check “Display Delete Confirmation Dialog.”
Y. Manage your Trash on MacOS
Sadly, macOS doesn't allow you to disable the Trash, so we recommend that you use the "delete immediate" functionality to manually bypass the trash, and configure your trash to be emptied every 30 days.
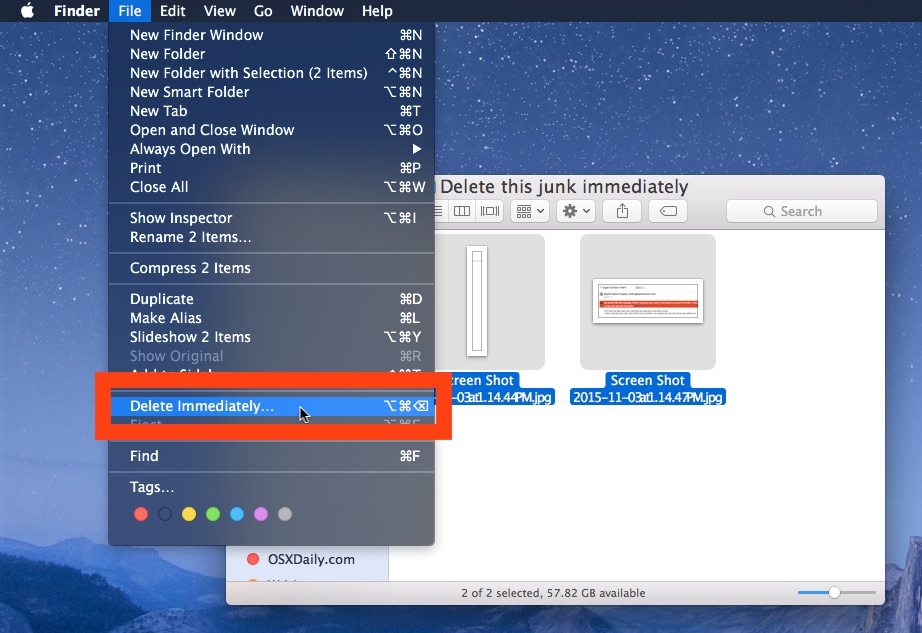
1. Use Delete Immediately
- Select the file(s) or folder(s) you wish to instantly and permanently delete and press:
Option + Command + Delete
- Confirm with the dialog that you wish to delete the files permanently and immediately
Or if you can't remember the shortcut, it's also available from Finder's File menu as shown below
2. Empty the Trash every 30 days
To automatically remove items from your trash after 30 days:
- From the Finder in MacOS, go to the “Finder” menu and choose “Preferences”
https://cdn.osxdaily.com/wp-content/uploads/2016/11/auto-remove-items-from-trash-30-days-macos-768x491.jpg - Go to the “Advanced” tab and check the box for “Remove items from the Trash after 30 days”
Once this feature has been enabled, individual items in the Trash in Mac OS will essentially have a 30 day timer where they are counting down until they are automatically deleted. In other words, each file will delete itself automatically after the 30 days pass individually, the Trash doesn’t just empty itself once every 30 days. You can still of course manually empty the trash as well.
Sources : HowToGeek, TechRepublic, WinAero, TutsPlus, HowToGeek, OSX Daily, OSX Daily, groovypost